Since this is actually part of my job, thus I did give it a try and document everything in my blog. Feel free to try and share your thought with me if you like.
Here are the postings will be included in the topic of "How to become MIS for your house" and I will update them from time to time as long as it is available from my note.
- Setup Home Wireless - 1: Firewall Appliance ( pfSense ) + PoE Switch + Access Points x 2 and IPAM
- Providing storage volumes and Share data at home - 2: Setup Samba for sharing videos, music and data and install, configure FreeNAS.
- More Network Services - 3: DNS, Revere Proxy and VPN to allow connect from outside to your home private LAN.
This post, we will focus on how to setup a general home wireless services. In my case, since my hose has two floors and Wireless access points have to be two and separate on each floor to allow to provide strong wireless signal. If your house have two or multiple floors, this post is great fit for you.
Here is my required gears list to set up my home internet. The total cost is around 600USD.
- Internet Service from ISP (Internet Service Provider)
- I got Comcast Business Cable Internet Service which is more stable then regular home internet service. https://business.comcast.com/internet/business-internet
- Cable Modem:
- Firewall Appliance
- https://www.amazon.com/gp/product/B01GIVQI3M/ref=oh_aui_detailpage_o08_s01?ie=UTF8&psc=1
- 64GB SATA SSD for Firewall OS - pfSense https://www.amazon.com/gp/product/B00K67E5DA/ref=oh_aui_detailpage_o08_s00?ie=UTF8&psc=1
- Another Option is adopted Ubiquiti product family which you will enjoy the easy setup and Ubiquiti software integration, however it's expensive gear in old day but now this firewll appliance is cheaper than Protectli (Firewall Micro Appliance). https://www.amazon.com/gp/product/B00LV8YZLK/ref=oh_aui_detailpage_o01_s01?ie=UTF8&psc=1
- PoE Switch
- https://www.amazon.com/gp/product/B00M1C03U2/ref=oh_aui_detailpage_o09_s01?ie=UTF8&psc=1
- Ubiquiti production family ( it is more expensive than regular brands ): https://www.amazon.com/gp/product/B00OJZUQ24/ref=oh_aui_detailpage_o01_s00?ie=UTF8&psc=1
- Wireless Access Points
- Ethernet Cables - Depends on the distance between your PoE switch to your Wireless Access Point location
- Option: I Haven't try this Security UniFi Controller which allow you to operate your LAN setting from remote which is very interesting however I haven't test the compatibility with Non-Ubiquiti gear. https://www.amazon.com/gp/product/B07BB4RGQD/ref=oh_aui_detailpage_o01_s02?ie=UTF8&psc=1
Before I start, I actually architect it and took some of advice from my coworker. The architecture design is as below.
 |
| Home Internet Design and Archtecture |
As you can see above architecture diagram, the process will be as below.
1. Make sure your ISP connect your cable modem and let internet service up and running - you can see above I am using Comcast Business ISP and connect to Motorola Cable Model on above diagram left top corner.
2. Setup Firewall Appliance - https://doc.pfsense.org/index.php/Installing_pfSense has steps from a to e.
Prepare Installation Media: The downloaded image must be written to target media before it can be used. For a Full Install, this media is used to boot and install and then will not be needed again. For Embedded, the target media is the disk (CF/SD) that will contain the Operating System.
- Write the installer ISO: If the .iso file was downloaded, it must be burned to a disc as an ISO image. See Writing ISO Images for assistance.
- Writing Memstick or NanoBSD images: This task is covered with great detail in the Writing Disk Images article here on the wiki.
Performing a Full Install (ISO, Memstick) Power on the target system and connect the install media: Place the CD into the drive or plug the Memstick into a USB port. If the BIOS is set to boot from CD/USB, pfSense will start. For other boot issues, Installation Troubleshooting. As the operating system boots and pfSense starts, a prompt is presented with some choices and a countdown timer. At this prompt, press i to invoke the installer now.

Alternately, allow the system to boot the rest of the way, assign interfaces, and then choose option 99 to invoke the installer.
The Quick/Easy Install option is, as the name implies, both Quick and Easy. That is the method which will be demonstrated here.
First, the installer console can be changed to use a different font, screenmap, or keymap. Most people do not need to change these, but it may help with some international keyboards.

At the Select Task prompt, choose Quick/Easy Install.

The Quick/Easy Install option assumes the first located disk is the intended target, so be sure there is only one SSD/HDD is present in the system.
- NOTE: A GEOM mirror (software RAID) may also be configured by choosing Custom Install and then invoking the option to create the mirror and select the disks. Once that has been completed, then it is possible to return to the Select Task screen and proceed with a Quick/Easy Install
Because the next step is destructive to whatever is currently on the target disk, confirmation is required to proceed. Select OK then press Enter.

The install will proceed, wiping the target disk and installing pfSense. Copying files may take some time to finish.
After the files have been copied to the target disk, a choice is presented to select the console type. Standard defaults to the VGA console. Embedded defaults to serial console.

Now the system must reboot so that pfSense may start from the target disk. Select Reboot and then press Enter. Be sure to remove the disc or USB memstick so that the system will not attempt to boot from there next time.


After the system reboots, pfSense will be running from the target disk. The next step is to Assign Interfaces on the Console below.
c. Post-Install Tasks
After installation and assignment, a shell menu is presented on the console with a number of options. pfSense now is ready to be accessed via the network, either on the LAN interface (if one is assigned), or on the WAN interface in a single interface deployment.

d. Assign Interfaces on the Console
The default configuration file on pfSense 2.3 has em0 assigned as WAN, and em1 assigned as LAN. If the target hardware has em0 and em1, then the assignment prompt is skipped and the install will proceed as usual. Several other common platforms such as our SG systems, APU, and ALIX are also recognized and will have their interfaces assigned in the expected order.
If the hardware platform cannot be identified, a list of network interfaces and their MAC addresses that were located on the system will appear, along with an indication of their link state if that is supported by the network card. The link state is denoted by "(up)" appearing after the MAC address if a link is detected on that interface. The MAC (Media Access Control) address of a network card is a unique identifier assigned to each card, and no two network cards should have the same MAC address. After that, a prompt will be shown for VLAN configuration.
e. login into Web GUI
Open a web browser and navigate to https://192.168.1.1 using the default username admin and password pfsense to login.

The first visit to the WebGUI will be redirected to the setup wizard, which is also accessible at System > Setup Wizard. Proceed through the wizard and configure things as desired.
3. After you setup Firewall Appliance, then connect Ethernet Cable from Firewall Appliance to PoE Switch. The model we bought you don't need to configure, however if you bought commercial one which might need extra configuration.
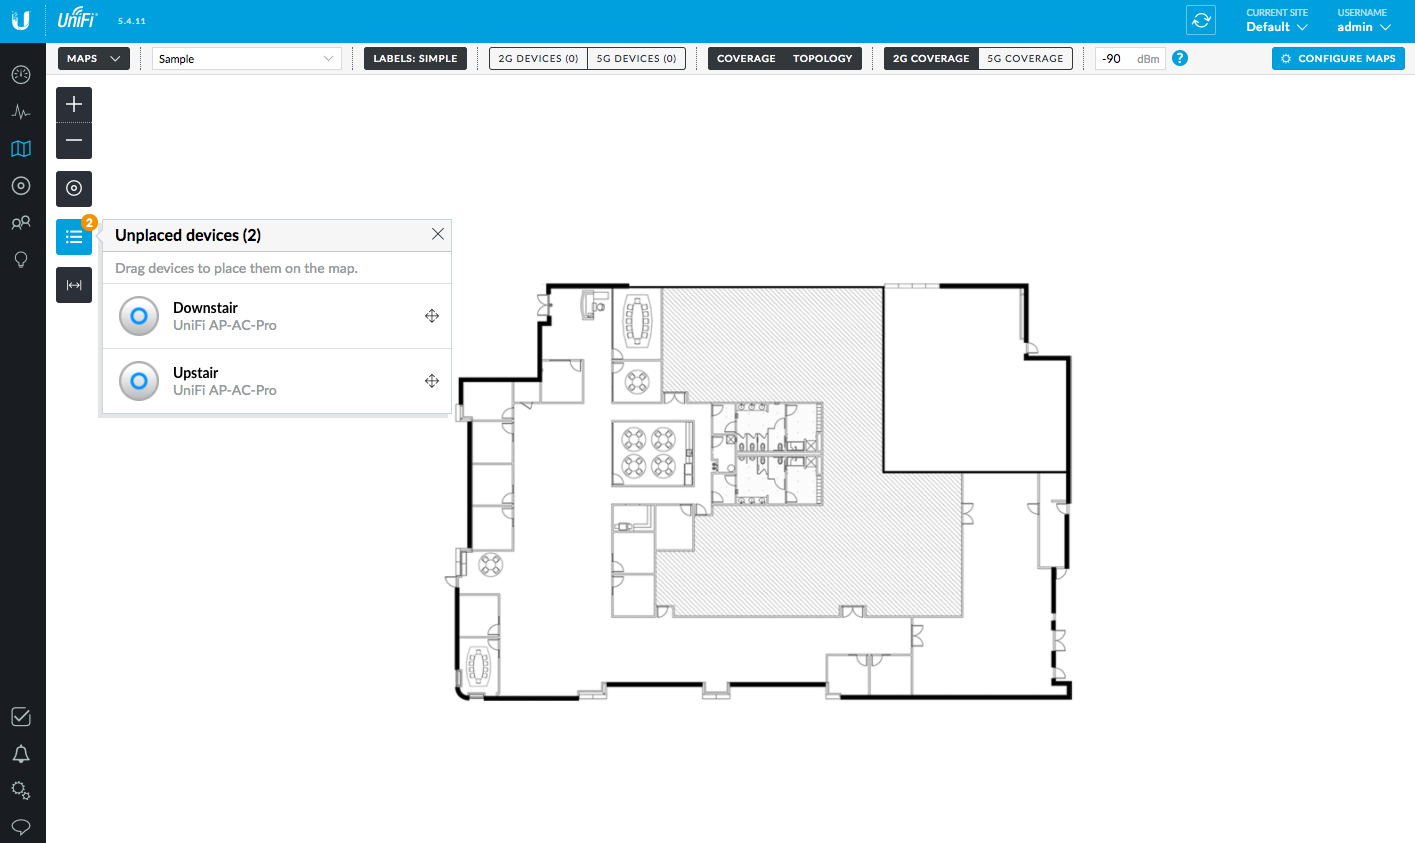
a. Install Software : Since I bought Ubiquiti Network Access Point, Ubiquiti provides a piece of software to allow you monitor your wireless call UniFi Controller. Here is the example, as you can see there has AP(Access Points) in Upstair and Downstair then I know which device and where is accessing my wireless now.
b. Not only the configure your Wireless AP but also monitor all the devices who is access your Wireless AP. The example is as below.

For setting up a IPAM to monitor/manage all your IPs (Devices) at home might need a extra machine, it can be a VM or bare metal. I was using Ubuntu 1604 on a workstation.
a. Setup phpIPAM, this post is the best I can find in internet. There has screen shot to walk through you one by one to setup phpIPAM on your box. I think this dude did a great job: https://ithinkvirtual.com/2016/05/08/installing-phpipam-on-ubuntu-16-04/
b. After you setup your IPAM, then try to login to web GUI. such as http://{IP}/phpipam. For adding a new subnet in your house(or company) you need to put such as 192.168.1.0/24 (CIRD-Classless Inter-Domain Routing format) in "Subnet" column.


After you give a proper mark and description then you should be see all the IPs has been managed properly in your IPAM. The example is as below fyi.

That it ! You setup cable and wireless AP for your home and manage wireless access devices and some static IPs for your home workstation or servers. So you are almost be a Network Admin for a small scale size company now !!!
